지난 포스팅에서는 실루엣 처리를 위해
Render Feature를 추가하고, Depth Buffer를 이용해 렌더링을 필터링 했었다.
당연하지만, 이러한 Render Feature는 커스터마이징이 가능하다.
특히 유니티 6.0으로 넘어오면서, Render Graph 시스템이 정식으로 도입되어서
쉬운(?) => 더럽게 짜증나는 모듈식으로 개발 가능하도록 변경 되었다.
기존의 커스텀 SRP에서 사용되는 방식이 아니라 새롭게 바꿔야 한다.
https://docs.unity3d.com/6000.0/Documentation/Manual/urp/render-graph-introduction.html
RenderGraph API
커스텀 SRP 렌더 패스를 보다 큰 틀에서 접근하도록 렌더 그래프를 생성하여 렌더 파이프라인의 렌더 패스에서 리소스를 어떻게 사용할 지를 나타낼 수 있게 한다.
렌더 그래프로 표현할 경우, 다음 장점이 있다고 한다.
(1) 렌더 파이프라인의 구성이 간소화 된다.
(2) 렌더 그래프가 렌더 파이프라인을 좀 더 효율적으로 관리하여 성능이 향상
Render Graph API를 이용할 때, 다음 사항들을 참고하자.
- 리소스는 더 이상 사용자가 직접 관리하지 않고, 렌더 그래프 시스템 전용 핸들러를 사용한다.
(리소스 타입 : RTHandles, ComputeBuffers, RendererLists)
- 실제 리소스의 레퍼런스는 렌더 패스의 실행 코드에서만 접근 가능
- 렌더 패스를 명시적으로 선언해야 하며, 렌더 패스들은 어떤 리소스에서 읽고 쓰는지 명시 해야 함.
- 렌더 그래프의 실행 간에는 지속성이 없다. 렌더 그래프의 실행에서 생성된 리소스가 다음 실행으로 이어지지 않는다.
- 만약 다음 프레임으로 지속성이 필요한 리소스의 경우는 렌더 그래프 밖에서 생성한 다음 임포트 할 수 있다. 종속적으로 다른 렌더 그래프 리소스와 동일하게 동작하지만, 그래프가 수명을 관리하지 않는다.
- 렌더 그래프는 텍스처 리소스로 대부분 RTHandles를 사용한다. 쉐이더 코드를 작성하고 관리하는 부분에 영향을 준다.
리소스 관리
렌더 그래프 시스템은 각 리소스의 수명을 계산하여. 자동으로 할당하고 해지한다.
Render Graph API를 이용하여 리소스를 생성하면, 실제로 생성된 것이 아니라 핸들러를 반환한다.
프로세스
렌더 그래프 시스템은 프레임마다 처음부터 시작하는 3단계 프로세스로 구분된다.
(1) Configure
모든 렌더 패스를 설정하며, 실행할 모든 렌더 패스와 리소스를 여기에서 선언한다.
(2) Compile
그래프를 컴파일한다. 사용하지 않는 렌더 그래프는 자동으로 컬링 된다.
리소스들의 수명도 계산하고 비동기 계산의 경우에는 동기화 지점을 계산한다.
(3) Execute
선언된 렌더 패스를 순서대로 실행한다.
여기서 실제 리소스들이 생성되며, 다음 렌더 패스에서 리소스가 사용되지 않으면 해제 된다.
예시 코드
using UnityEngine;
using UnityEngine.Rendering;
using UnityEngine.Rendering.Universal;
using UnityEngine.Rendering.RenderGraphModule;

public class TintRendererFeature : ScriptableRendererFeature
{
    public RenderPassEvent injectionPoint = RenderPassEvent.AfterRendering;
    // Material with the Tint conversion shader
    public Material passMaterial;
    private ProfilingSampler m_Sampler;
    // Needed requirements for the pass
    public ScriptableRenderPassInput requirements = ScriptableRenderPassInput.Color;
    private static readonly int m_BlitTextureID = Shader.PropertyToID("_BlitTexture");
    private static readonly int m_BlitScaleBiasID = Shader.PropertyToID("_BlitScaleBias");

    private static MaterialPropertyBlock s_SharedPropertyBlock = null;

    class TintPass : ScriptableRenderPass
    {
        private Material m_Material;
        private string m_PassName;
        private ProfilingSampler m_Sampler;
        private static Material s_FrameBufferFetchMaterial;

        // This class stores the data needed by the RenderGraph pass.
        // It is passed as a parameter to the delegate function that executes the RenderGraph pass.
        private class PassData
        {
            internal Material material;
            internal TextureHandle source;
        }

        public TintPass(Material mat, string name)
        {
            m_PassName = name;
            m_Material = mat;
            m_Sampler ??= new ProfilingSampler(GetType().Name + "_" + name);
            s_FrameBufferFetchMaterial ??= UnityEngine.Resources.Load("FrameBufferFetch") as Material;
        }

        private static void ExecuteCopyColorPass(RasterCommandBuffer cmd, RTHandle sourceTexture)
        {
            //Blitter.BlitTexture(cmd, sourceTexture, new Vector4(1, 1, 0, 0), 0.0f, false);
            cmd.DrawProcedural(Matrix4x4.identity, s_FrameBufferFetchMaterial, 1, MeshTopology.Triangles, 3, 1, null);
        }

        private static void ExecuteMainPass(RasterCommandBuffer cmd, Material material, RTHandle copiedColor)
        {
            s_SharedPropertyBlock.Clear();
            if (copiedColor != null)
                s_SharedPropertyBlock.SetTexture(m_BlitTextureID, copiedColor);

            // We need to set the "_BlitScaleBias" uniform for user materials with shaders relying on core Blit.hlsl to work
            s_SharedPropertyBlock.SetVector(m_BlitScaleBiasID, new Vector4(1, 1, 0, 0));

            cmd.DrawProcedural(Matrix4x4.identity, material, 0, MeshTopology.Triangles, 3, 1, s_SharedPropertyBlock);
        }

        // RecordRenderGraph is where the RenderGraph handle can be accessed, through which render passes can be added to the graph.
        // FrameData is a context container through which URP resources can be accessed and managed.
        public override void RecordRenderGraph(RenderGraph renderGraph, ContextContainer frameData)
        {
            UniversalResourceData resourceData = frameData.Get<UniversalResourceData>();

            // We need a copy of the color texture as input for the blit with material
            // Retrieving texture descriptor from active color texture after post process
            var colCopyDesc = renderGraph.GetTextureDesc(resourceData.afterPostProcessColor);
            // Changing the name
            colCopyDesc.name = "_TempColorCopy";
            // Requesting the creation of a texture to Render Graph, Render Graph will allocate when needed
            TextureHandle copiedColorTexture = renderGraph.CreateTexture(colCopyDesc);

            // First blit, simply copying color to intermediary texture so it can be used as input in next pass
            using (var builder = renderGraph.AddRasterRenderPass<PassData>(m_PassName + "_CopyPass", out var passData, m_Sampler))
            {
                // Setting the URP active color texture as the source for this pass
                passData.source = resourceData.activeColorTexture;

                // Setting input texture to sample
                //builder.UseTexture(resourceData.activeColorTexture, AccessFlags.Read);
                builder.SetInputAttachment(resourceData.activeColorTexture, 0);
                // Setting output attachment
                builder.SetRenderAttachment(copiedColorTexture, 0, AccessFlags.Write);

                // Execute step, simple copy
                builder.SetRenderFunc((PassData data, RasterGraphContext rgContext) =>
                {
                    ExecuteCopyColorPass(rgContext.cmd, data.source);
                });
            }

            // Second blit with material, applying gray conversion
            using (var builder = renderGraph.AddRasterRenderPass<PassData>(m_PassName + "_FullScreenPass", out var passData, m_Sampler))
            {
                // Setting the temp color texture as the source for this pass
                passData.source = resourceData.activeColorTexture;
                // Setting the material
                passData.material = m_Material;

                // Setting input texture to sample
                //builder.UseTexture(copiedColorTexture, AccessFlags.Read);
                builder.SetInputAttachment( copiedColorTexture, 0);
                // Setting output attachment
                builder.SetRenderAttachment(resourceData.activeColorTexture, 0, AccessFlags.Write);

                // Execute step, second blit with the gray scale conversion
                builder.SetRenderFunc((PassData data, RasterGraphContext rgContext) =>
                {
                    ExecuteMainPass(rgContext.cmd, data.material, data.source);
                });
            }
        }
    }

    TintPass m_pass;

    /// <inheritdoc/>
    public override void Create()
    {
        m_pass = new TintPass(passMaterial, name);
        m_pass.renderPassEvent = injectionPoint;
        m_pass.ConfigureInput(requirements);
    }

    public void OnEnable()
    {
        if(s_SharedPropertyBlock == null)
            s_SharedPropertyBlock = new MaterialPropertyBlock();
    }

    // Here you can inject one or multiple render passes in the renderer.
    // This method is called when setting up the renderer once per-camera.
    public override void AddRenderPasses(ScriptableRenderer renderer, ref RenderingData renderingData)
    {
        renderer.EnqueuePass(m_pass);
    }
}
우선, 전체적인 구조를 살펴보자.
TintRenderFeature 라는 렌더 피쳐에서 렌더 그래프를 실행할 것이다.
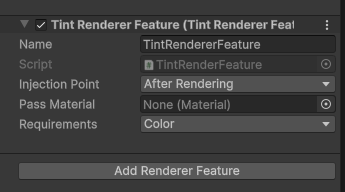
렌더 피쳐의 선언 부분을 보면,
public RenderPassEvent injectionPoint = RenderPassEvent.AfterRendering;
// Material with the Tint conversion shader
public Material passMaterial;
private ProfilingSampler m_Sampler;
// Needed requirements for the pass
public ScriptableRenderPassInput requirements = ScriptableRenderPassInput.Color;
private static readonly int m_BlitTextureID = Shader.PropertyToID("_BlitTexture");
private static readonly int m_BlitScaleBiasID = Shader.PropertyToID("_BlitScaleBias");

private static MaterialPropertyBlock s_SharedPropertyBlock = null;
(1) RenderPassEvent 는 해당 렌더 피쳐가 어디에 삽입될지를 선택할 수 있게 해준다.
(2) Material 은 복사에 사용 될 매트리얼이다.
(3) ProfilingSampler를 초기화한다. 이를 초기화하면 _BlitTexture, _BlitScaleBias에 액세스 할 수 있게 해준다.
* 쉐이더의 _MainTex_St 같은 방식이다.
(4) 렌더 패스의 입력으로 사용될 Requirements는 컬러로 설정한다.
(5) MaterialPropertyBlock를 정의한다.
이후에 Render Pass를 정의하고 있다. 해당 예시에서는 TintPass이다.
class TintPass : ScriptableRenderPass
{
        private Material m_Material;
        private string m_PassName;
        private ProfilingSampler m_Sampler;
        private static Material s_FrameBufferFetchMaterial;

        ...

}
Tint Pass 안에는 Tint Pass 에서 사용될 데이터를 PassData로 정의해야 한다.
이후에는 생성자를 통해 매트리얼를 초기화하고, 이 렌더 패스의 위치를 지정한다.
private class PassData
{
    internal Material material;
    internal TextureHandle source;
}

public TintPass(Material mat, string name)
{
    m_PassName = name;
    m_Material = mat;
    m_Sampler ??= new ProfilingSampler(GetType().Name + "_" + name);
    s_FrameBufferFetchMaterial ??= UnityEngine.Resources.Load("FrameBufferFetch") as Material;
}
??= 이란 오퍼레이터가 생소한데.
Null 병합 연산자라고 한다.
m_Sampler가 Null인 경우, 새로운 값으로 초기화 한다는 뜻이다.
        public override void RecordRenderGraph(RenderGraph renderGraph, ContextContainer frameData)
        {
            UniversalResourceData resourceData = frameData.Get<UniversalResourceData>();

            // We need a copy of the color texture as input for the blit with material
            // Retrieving texture descriptor from active color texture after post process
            var colCopyDesc = renderGraph.GetTextureDesc(resourceData.afterPostProcessColor);
            // Changing the name
            colCopyDesc.name = "_TempColorCopy";
            // Requesting the creation of a texture to Render Graph, Render Graph will allocate when needed
            TextureHandle copiedColorTexture = renderGraph.CreateTexture(colCopyDesc);

            // First blit, simply copying color to intermediary texture so it can be used as input in next pass
            using (var builder = renderGraph.AddRasterRenderPass<PassData>(m_PassName + "_CopyPass", out var passData, m_Sampler))
            {
                // Setting the URP active color texture as the source for this pass
                passData.source = resourceData.activeColorTexture;

                // Setting input texture to sample
                //builder.UseTexture(resourceData.activeColorTexture, AccessFlags.Read);
                builder.SetInputAttachment(resourceData.activeColorTexture, 0);
                // Setting output attachment
                builder.SetRenderAttachment(copiedColorTexture, 0, AccessFlags.Write);

                // Execute step, simple copy
                builder.SetRenderFunc((PassData data, RasterGraphContext rgContext) =>
                {
                    ExecuteCopyColorPass(rgContext.cmd, data.source);
                });
            }

            // Second blit with material, applying gray conversion
            using (var builder = renderGraph.AddRasterRenderPass<PassData>(m_PassName + "_FullScreenPass", out var passData, m_Sampler))
            {
                // Setting the temp color texture as the source for this pass
                passData.source = resourceData.activeColorTexture;
                // Setting the material
                passData.material = m_Material;

                // Setting input texture to sample
                //builder.UseTexture(copiedColorTexture, AccessFlags.Read);
                builder.SetInputAttachment( copiedColorTexture, 0);
                // Setting output attachment
                builder.SetRenderAttachment(resourceData.activeColorTexture, 0, AccessFlags.Write);

                // Execute step, second blit with the gray scale conversion
                builder.SetRenderFunc((PassData data, RasterGraphContext rgContext) =>
                {
                    ExecuteMainPass(rgContext.cmd, data.material, data.source);
                });
            }
        }
    }
RecordRenderGrpah 는 세팅과 실행을 동시에 수행할 수 있다.
일단 파라미터부터 보자
RednerGraph renderGraph 는 렌더 그래프가 접근 가능하도록 하는 핸들러이다.
FrameData 는 URP Resource로부터 접근 및 관리 가능한 Context Container 이다.
아래 부분부터는 정신차리고 살펴보자. 모르는 용어가 있으면 즉각 알아보는게 이해하는데 수월하다.
UniversalReousrceData 는 FrameData로부터 받아오는 텍스처를 관리하는 클래스이다.
(텍스처에 관련하여 여러가지 정보를 얻을 수 있다.)
var colCopyDesc = renderGraph.GetTextureDesc(resourceData.afterPostProcessColor);기존에는 해당 값들을 직접 가져와서 복사를 했는데, 렌더 그래프에서는 renderGraph API 를 이용해서 복사한다.
TextureHandle copiedColorTexture = renderGraph.CreateTexture(colCopyDesc);
텍스처도 마찬가지로, RenderGraph 함수를 이용해 텍스처 핸들러로 만들어준다.
여기서 텍스처가 생성된게 아니라, 텍스처로서 관리될 핸들러가 된다는 것을 유의하자.
Raster Render Pass
AddRasterRenderPass
RenderGraph에 Raster Render Pass를 추가하는 함수이다.
이게 무슨 말인고 하면..
일종의 색안경 필터를 끼우는 행위라고 보면 된다.
만약 카메라에 담긴 어떤 화면에 Raster Render Pass로 색안경을 껴서
모든 화면을 특정 색으로 표현하게 해주는.. 그런 패스를 Raster Render Pass라 한다.
코드를 살펴보자.
using (var builder = renderGraph.AddRasterRenderPass<PassData>(m_PassName + "_CopyPass", out var passData, m_Sampler))RenderGraphAPI에 AddRasterRenderPass를 요청하면, IRasterRenderGraphBuilder 라는 타입형을 반환한다.
    using (var builder = renderGraph.AddRasterRenderPass<PassData>(m_PassName + "_CopyPass", out var passData, m_Sampler))
    {
        // Setting the URP active color texture as the source for this pass
        passData.source = resourceData.activeColorTexture;

        // Setting input texture to sample
        //builder.UseTexture(resourceData.activeColorTexture, AccessFlags.Read);
        builder.SetInputAttachment(resourceData.activeColorTexture, 0);
        // Setting output attachment
        builder.SetRenderAttachment(copiedColorTexture, 0, AccessFlags.Write);

        // Execute step, simple copy
        builder.SetRenderFunc((PassData data, RasterGraphContext rgContext) =>
        {
            ExecuteCopyColorPass(rgContext.cmd, data.source);
        });
    }
render pass를 추가하고, 휘방성으로 실행이 끝나면 자동으로 dispose 되는 방식이다.
passData의 source에 색상을 입히고, Raster Render Pass의 여러 메소드를 이용하여 처리한다.
| SetInputAttachment | sampling 하기 위해 입력 텍스처를 세팅 |
| SetRenderAttachment | output 타겟을 설정 |
| SetRenderFunc<PassData> | Execute 부분 |
* 외에도 함수가 여러개 지원하니 Docs 문서를 보자
정리하고 나니 크게 어렵지 않은 것을 알 수 있다.
입력 타겟, 아웃풋 타겟 설정하고. 그 함수를 실행 시키는데, 내부에 실행 부분을 구현하는 방식이다.
ExecuteCopyColorPass
private static void ExecuteCopyColorPass(RasterCommandBuffer cmd, RTHandle sourceTexture)
{
    //Blitter.BlitTexture(cmd, sourceTexture, new Vector4(1, 1, 0, 0), 0.0f, false);
    cmd.DrawProcedural(Matrix4x4.identity, s_FrameBufferFetchMaterial, 1, MeshTopology.Triangles, 3, 1, null);
}
단순히 값을 복사하는 함수인데, 입력 파라미터로는 RasterCommandBuffer, RTHandle이 들어온다.
    // Second blit with material, applying gray conversion
    using (var builder = renderGraph.AddRasterRenderPass<PassData>(m_PassName + "_FullScreenPass", out var passData, m_Sampler))
    {
        // Setting the temp color texture as the source for this pass
        passData.source = resourceData.activeColorTexture;
        // Setting the material
        passData.material = m_Material;

        // Setting input texture to sample
        //builder.UseTexture(copiedColorTexture, AccessFlags.Read);
        builder.SetInputAttachment( copiedColorTexture, 0);
        // Setting output attachment
        builder.SetRenderAttachment(resourceData.activeColorTexture, 0, AccessFlags.Write);

        // Execute step, second blit with the gray scale conversion
        builder.SetRenderFunc((PassData data, RasterGraphContext rgContext) =>
        {
            ExecuteMainPass(rgContext.cmd, data.material, data.source);
        });
    }
두번째 렌더 패스 추가 부분이다.
매트리얼 부분이 추가 되고, ExecuteMainPass 함수가 변하였다.
private static void ExecuteMainPass(RasterCommandBuffer cmd, Material material, RTHandle copiedColor)
{
    s_SharedPropertyBlock.Clear();
    if (copiedColor != null)
        s_SharedPropertyBlock.SetTexture(m_BlitTextureID, copiedColor);

    // We need to set the "_BlitScaleBias" uniform for user materials with shaders relying on core Blit.hlsl to work
    s_SharedPropertyBlock.SetVector(m_BlitScaleBiasID, new Vector4(1, 1, 0, 0));

    cmd.DrawProcedural(Matrix4x4.identity, material, 0, MeshTopology.Triangles, 3, 1, s_SharedPropertyBlock);
}

이쯤 되면, 기억이 안 날 부분인데
BlitTexutreID/ BlitScaleBiasID는 BLIT.HLSL 쉐이더에서 받아오는 값이다.
BLIT.HLSL 는 잘 알아둬야 하는데, 화면 전체에 대한 값을 받아올 수 있는 헬퍼 쉐이더이다.
화면을 사각형 안으로 샘플링 할 수 있도록 도와준다.
장황하게 설명했으니 최대한 다시 한번 정리해보자.
TintRenderFeature 는 Custom Render Feature로 SRP 안에서 하나의 렌더 피쳐로 사용된다.
TintRenderFeature는 Tint Pass 라는 이름으로 Render Pass를 사용한다.
Tint Pass안에는 추가적으로 2개의 Rasterization Render Pass 가 포함된다.

'Game Dev > Unity Shader' 카테고리의 다른 글
| 붉은 스캔 이펙트를 만들어보자 - Unity Shader (0) | 2025.12.23 |
|---|---|
| Cel Shading 이란? (Cel / Toon Shading) - Research (0) | 2025.12.23 |
| 실루엣 렌더링하기. (Render Silhouette), 새 포스팅 시리즈 예고 (?) - Unity Pipeline callbacks (0) | 2025.12.04 |
| 유니티 공식 지원 강력한 UI 쉐이더 샘플 - 유니티 Shader Graph (1) | 2025.11.27 |
| Sprite Outline Shader - 유니티 Shader Graph (0) | 2025.11.25 |